
Every Hardware, Software, Thermal, and In-Game Setting You Need
If you've ever watched a friend play on a 120Hz monitor after spending years on a 60Hz panel, you understand why this matters. The difference isn't subtle — it's the difference between watching a movie and being inside one. At 120 frames per second, animation is fluid, aim is precise, and input lag drops to levels that competitive players describe as "feeling like an extension of your hand."
But hitting and sustaining 120 FPS is a system-wide challenge. It requires the right GPU, the right CPU, correctly configured RAM, optimized BIOS settings, dialed-in Windows configuration, proper driver settings, and in-game graphics choices that don't sacrifice frame rate unnecessarily. This guide covers every layer of that stack.
Whether you're building a new machine or optimizing an existing one, every section below translates directly to frames on your screen.
WHY 120 HZ GAMING IS A FUNDAMENTALLY DIFFERENT EXPERIENCE
The Physics of High Refresh Rate
A standard 60Hz monitor refreshes its image 60 times per second, displaying a new frame every 16.67 milliseconds. A 120Hz panel halves that interval to 8.33 milliseconds per frame. This isn't just a spec — it's a perceptual threshold that changes how your brain processes motion.
Human visual perception can detect motion blur and frame discontinuity well above 60Hz, particularly during fast camera pans, rapid target acquisition in shooters, and high-speed racing games. Studies in visual ergonomics consistently show that subjects identify motion as "smooth" at higher thresholds when they've been exposed to high-refresh-rate content. Your eyes adapt upward.
The secondary benefit is input latency reduction. When paired with NVIDIA Reflex or AMD Anti-Lag, a 120Hz gaming setup can achieve end-to-end system latency (from mouse click to pixel change) below 20 milliseconds in competitive titles — a 50-60% reduction from typical 60Hz configurations. At this level, your reaction time becomes the bottleneck, not your hardware.
Frame Rate vs. Refresh Rate: The Key Distinction
Your monitor's refresh rate is the maximum number of frames it can display per second. Your GPU's frame rate is how many frames it renders per second. These are separate systems that must be aligned:
- If your GPU renders 80 FPS on a 120Hz monitor, you get 80Hz effective refresh — the extra capacity is wasted and you'll see tearing without VSync or G-SYNC.
- If your GPU renders 150 FPS on a 120Hz monitor, the monitor only displays 120 frames — the extras are dropped, and without frame synchronization you may see screen tearing.
- The sweet spot: GPU consistently renders 120+ FPS with G-SYNC/FreeSync active, monitor stays locked at 120Hz, and the image is perfectly smooth with no tearing or stutter.
This guide is about ensuring your entire system — hardware, drivers, OS, and game settings — is configured to keep that GPU output at or above 120 FPS, consistently, across the games you actually play.
GPU SELECTION AND UPGRADE PATH FOR 120 HZ GAMING
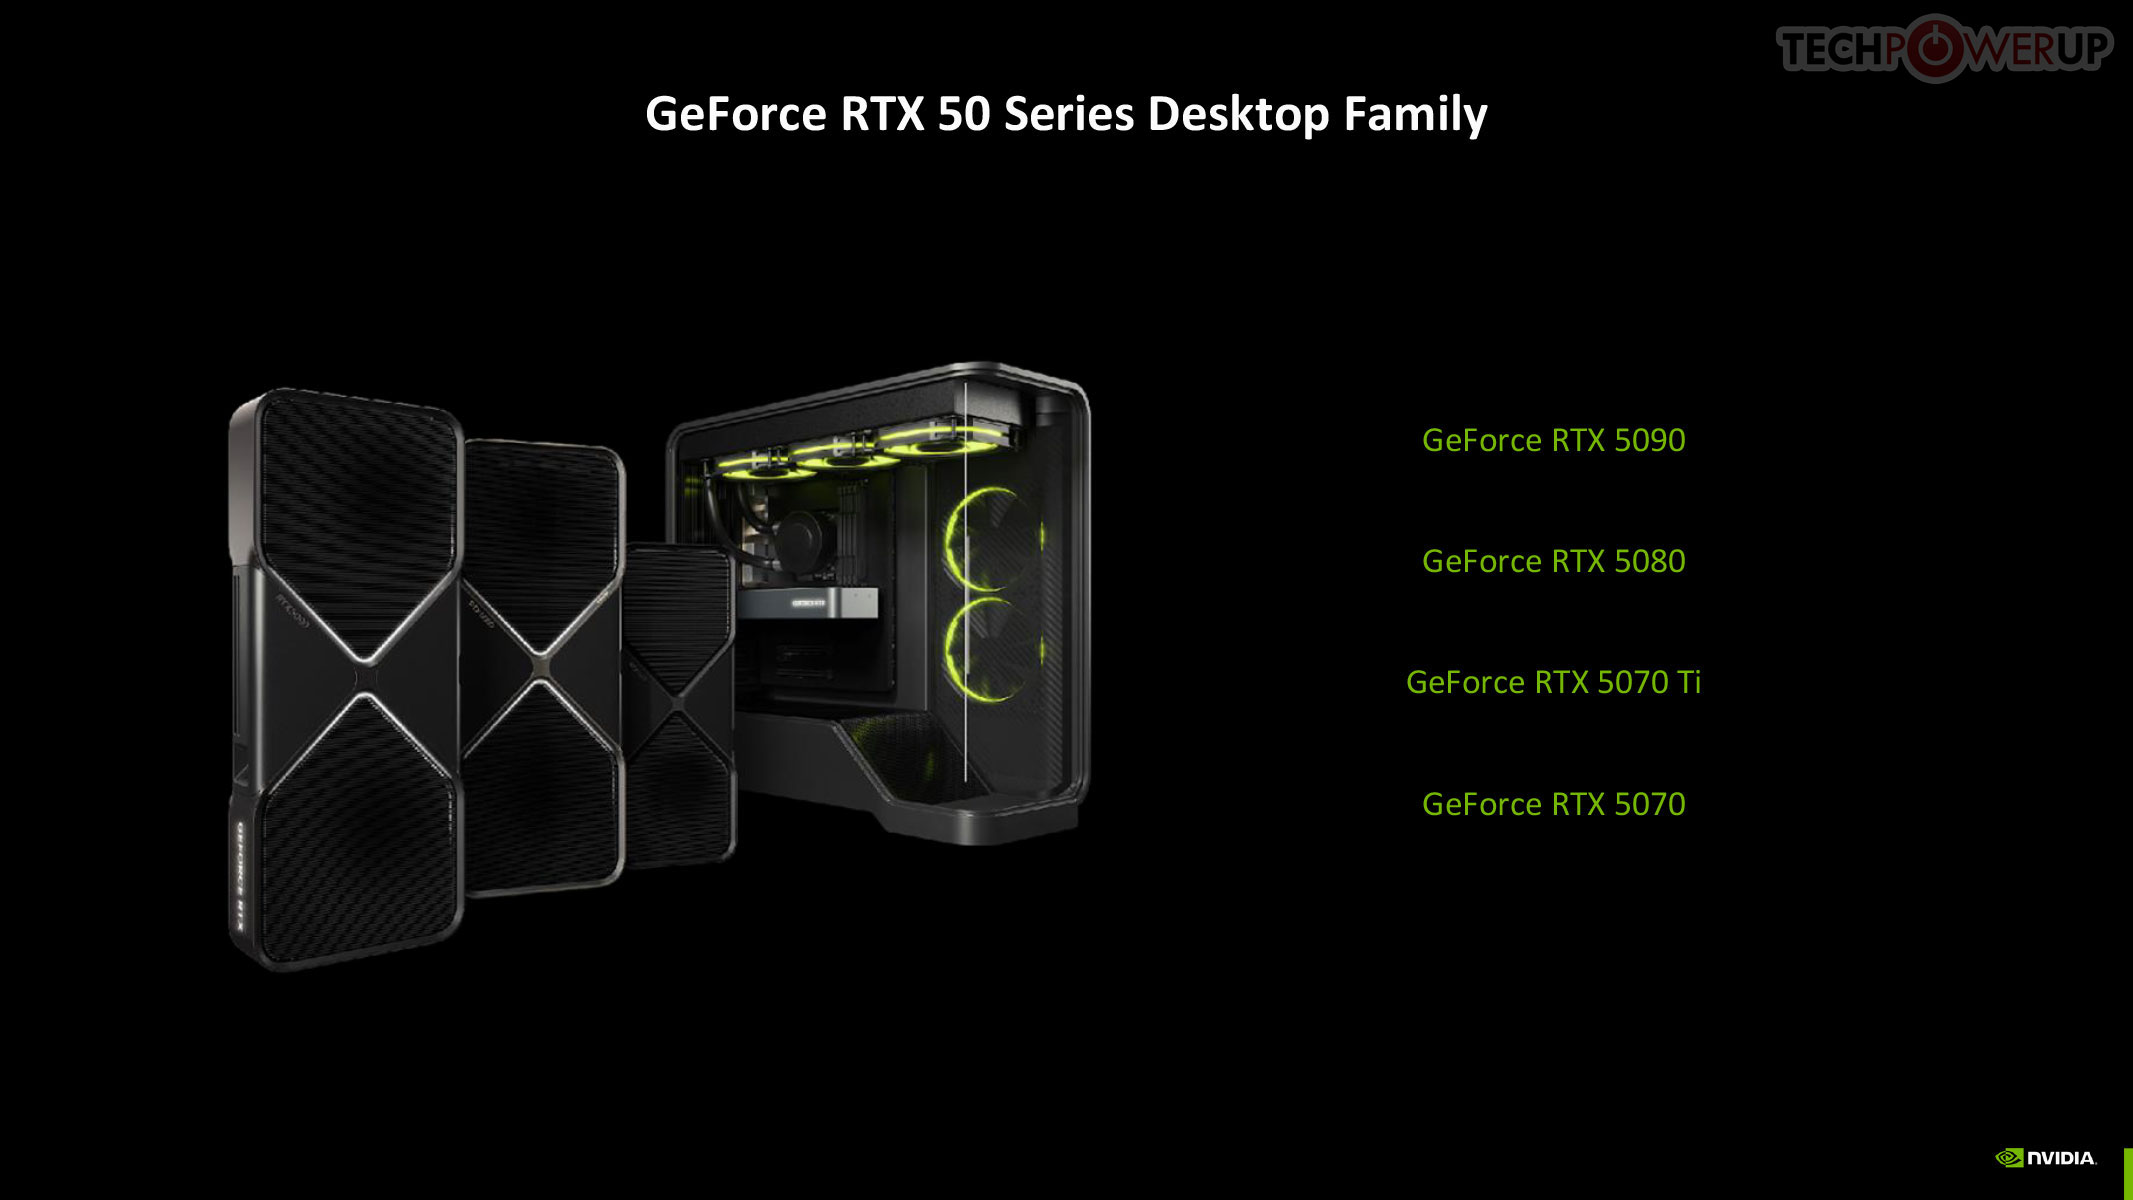
Your GPU is the single most important component for achieving 120 FPS. Every other optimization in this guide helps, but if your GPU is fundamentally underpowered for your resolution and settings, no amount of software tweaking will get you there.
1080p Gaming: Easiest Path to 120 FPS
At 1920×1080, the GPU workload is lightest. This is where mid-range cards genuinely shine, and where you have the most optimization headroom.
| GPU | Expected FPS at 1080p Ultra | Target Games | VRAM |
|---|---|---|---|
| RTX 5070 | 200–280 FPS | All titles including AAA | 12GB GDDR7 |
| RTX 5060 Ti | 160–220 FPS | AAA titles, esports | 8GB GDDR7 |
| RX 9070 | 170–230 FPS | All titles | 16GB GDDR6 |
| RTX 4070 | 140–190 FPS | Most AAA, esports | 12GB GDDR6X |
| RX 7800 XT | 130–175 FPS | Most AAA, esports | 16GB GDDR6 |
Minimum recommendation for 1080p 120Hz: RTX 4060 Ti or RX 7700 XT. These cards will hit 120 FPS in most titles at high settings, though you may need to drop a few settings in the most demanding AAA games.
1440p Gaming: The Performance Sweet Spot
2560×1440 represents a 77.8% pixel count increase over 1080p. This is where GPU selection becomes more critical and where mid-range cards start showing their limits in demanding titles.
| GPU | Expected FPS at 1440p Ultra | DLSS/FSR Recommended? | VRAM |
|---|---|---|---|
| RTX 5070 Ti | 160–220 FPS | Optional (already fast) | 16GB GDDR7 |
| RTX 5070 | 130–175 FPS | For demanding titles | 12GB GDDR7 |
| RX 9070 XT | 140–185 FPS | For demanding titles | 16GB GDDR6 |
| RTX 4070 Ti Super | 120–160 FPS | For most AAA titles | 16GB GDDR6X |
| RTX 4070 Ti | 110–150 FPS | Yes, for AAA Ultra | 12GB GDDR6X |
| RX 7900 GRE | 115–155 FPS | Yes, for AAA Ultra | 16GB GDDR6 |
Minimum recommendation for 1440p 120Hz: RTX 4070 or RX 7800 XT. Expect to use DLSS/FSR in demanding titles and potentially dial back a few settings. For consistent 120 FPS across all game types without compromise, the RTX 5070 or RX 9070 XT is the practical floor.
4K Gaming: The Premium Tier
3840×2160 is four times the pixel count of 1080p. Sustaining 120 FPS at 4K native in demanding AAA games requires flagship hardware. However, DLSS 4 and FSR 4 have changed this calculus significantly — rendering at 4K with quality upscaling can feel indistinguishable from native while costing far less GPU compute.
| GPU | Native 4K Ultra FPS | 4K with DLSS/FSR Quality | VRAM |
|---|---|---|---|
| RTX 5090 | 100–140 FPS | 160–220+ FPS | 32GB GDDR7 |
| RTX 5080 | 75–110 FPS | 130–170 FPS | 16GB GDDR7 |
| RTX 5070 Ti | 60–90 FPS | 110–150 FPS | 16GB GDDR7 |
| RX 9070 XT | 65–95 FPS | 110–150 FPS | 16GB GDDR6 |
Verdict for 4K 120Hz: RTX 5080 or better for native 4K 120 FPS in all games. RTX 5070 Ti or RX 9070 XT with DLSS/FSR Quality mode for a visually comparable experience at significantly higher frame rates than native rendering would provide.
The DLSS 4 / FSR 4 Factor
Modern upscaling has fundamentally changed the GPU requirement math. DLSS 4 with Multi Frame Generation can multiply effective frame output by 2-4x with minimal perceptual quality loss. If you're on an RTX 40 or RTX 50 series card, enabling DLSS can be the difference between 80 FPS and 160 FPS in demanding titles — without touching any other setting. AMD's FSR 4 offers similar quality improvements on RX 9000 series hardware.
CPU SELECTION, BOTTLENECK ANALYSIS, AND THE FRAME RATE CEILING PROBLEM
Understanding CPU Bottlenecking
A CPU bottleneck occurs when your processor cannot feed game world calculations, AI logic, physics, and draw call preparation to the GPU fast enough to keep it fully utilized. When this happens, your GPU sits idle waiting for work — and your frame rate is capped by CPU performance, not GPU capability.
This is especially critical at 120 FPS. At 60 FPS, you have 16.67ms per frame for the CPU to complete its work. At 120 FPS, that window shrinks to 8.33ms. A CPU that was adequate at 60 FPS may become the bottleneck at 120 FPS, particularly in CPU-heavy games like open-world titles, strategy games, and simulations with large numbers of AI entities.
How to Diagnose a CPU Bottleneck
- Open MSI Afterburner or HWiNFO64 and overlay GPU utilization on your game.
- Play your game normally for 10–15 minutes across varied scenarios (combat, open world, indoor areas).
- If GPU utilization sits below 90% while you're not hitting your target frame rate, you likely have a CPU bottleneck.
- Check CPU core utilization: if one or two cores are at 100% while others are idle, the game is single-thread limited.
- Cross-reference: lower your in-game resolution temporarily. If FPS jumps significantly, it's a GPU bottleneck. If it barely changes, it's the CPU.
CPU Recommendations for 120 FPS Gaming
| CPU | Core / Thread Count | Gaming Performance Tier | Best For |
|---|---|---|---|
| Intel Core Ultra 9 285K | 24C / 24T | Elite | 1080p esports, open world |
| AMD Ryzen 9 9950X | 16C / 32T | Elite | All gaming, streaming, content creation |
| Intel Core Ultra 7 265K | 20C / 20T | High-End | Gaming + workstation tasks |
| AMD Ryzen 7 9700X | 8C / 16T | High-End | Pure gaming focus |
| AMD Ryzen 5 9600X | 6C / 12T | Mid-Range | Budget 120Hz builds |
| Intel Core i5-14600K | 14C / 20T | Mid-Range | Budget 120Hz builds |
Key principle: For pure gaming at 120 FPS, single-core performance matters more than core count. The Ryzen 7 9700X with its high per-core IPC often outperforms higher core-count chips in gaming scenarios. Pair any of these with fast DDR5 RAM for best results.
The 1080p Esports Bottleneck Warning
At 1080p in esports titles (Valorant, CS2, Apex Legends), you can easily hit 300–500+ FPS with a strong GPU. At these frame rates, the CPU bottleneck becomes severe. If you're building for competitive 1080p gaming, prioritize a fast CPU (Core Ultra 9 285K or Ryzen 9 9950X) as much as the GPU. Your 240Hz monitor can only display what the CPU can deliver.
BIOS OPTIMIZATION FOR MAXIMUM GAMING PERFORMANCE
XMP / EXPO: The Single Most Impactful BIOS Setting
RAM ships from the factory at a conservative baseline speed (often DDR5-4800 or DDR4-2133) to ensure compatibility across all motherboards. The actual rated speed of your RAM kit — DDR5-6000, DDR4-3600, etc. — is only activated when you enable XMP (Intel) or EXPO (AMD) in the BIOS. This is one setting that can add 5–15% to gaming FPS on AMD systems and 3–8% on Intel systems. It costs nothing and takes 60 seconds.
How to Enable XMP / EXPO
- Restart your PC and press the BIOS key during POST (usually DEL or F2; check your motherboard manual).
- Find the memory settings. Look for "XMP," "D.O.C.P.," "EXPO," or "Memory Profiles" — terminology varies by board.
- Select the profile that matches your RAM's rated speed (e.g., DDR5-6000).
- Save and exit. Your system will reboot. Verify the speed in Windows Task Manager > Performance > Memory.
- If your system fails to POST, re-enter BIOS and try the next lower profile, or reduce the speed manually.
Resizable BAR (ReBAR)
Resizable BAR (also called Smart Access Memory on AMD platforms) allows the CPU to access the full GPU VRAM at once instead of in 256MB chunks. This removes a data-transfer bottleneck that can cause stutters and frame time inconsistency in certain games. Modern GPUs (RTX 30 series and newer, RX 6000 series and newer) and motherboards (Intel 10th gen and newer, AMD 500 series and newer) support this feature.
How to Enable Resizable BAR
- Enter BIOS and find "Above 4G Decoding" — enable it. This is a prerequisite.
- Find "Resizable BAR" or "Re-Size BAR Support" — enable it.
- Save and exit. Verify in NVIDIA Control Panel (System Information) or AMD Adrenalin (Performance metrics) that ReBAR is active.
Performance gains from ReBAR are game-dependent: 5–10% in games that benefit (Cyberpunk 2077, Forza Horizon 5, F1 series), negligible in others. It's always worth enabling — it costs nothing and never hurts performance.
CPU Power Limits
Many motherboard manufacturers ship with power limit overrides that allow CPUs to run above their TDP spec continuously. While this can improve performance, it also increases temperatures, which can trigger thermal throttling and reduce performance. Check your BIOS for "Long Duration Power Limit" (PL1) and "Short Duration Power Limit" (PL2) settings. For gaming, matching these to Intel or AMD's recommended values ensures the CPU boosts correctly without triggering throttle.
THERMAL OPTIMIZATION: PREVENTING FPS LOSS FROM THROTTLING
Thermal throttling is when your CPU or GPU reduces its clock speed to prevent damage from excessive heat. Even mild throttling — a 5–10% clock speed reduction — translates directly to lost frames. At 120 FPS targets, this can mean the difference between a smooth 125 FPS and a stuttery 110 FPS average with frequent 1% lows below 90.
CPU Cooling: Minimum Specifications by TDP
| CPU TDP Class | Minimum Cooler | Recommended Cooler | Target Temp Under Load |
|---|---|---|---|
| 65W TDP (budget CPUs) | Stock cooler or 120mm AIO | 240mm AIO or large air cooler | Below 75°C |
| 125W TDP (mid-range) | 240mm AIO or NH-D15 equivalent | 360mm AIO | Below 80°C |
| 170W+ TDP (enthusiast) | 360mm AIO minimum | 420mm AIO or high-flow 360mm | Below 85°C |
Apply fresh thermal paste every 2–3 years or when you notice temperatures rising. Premium thermal compounds (Thermal Grizzly Kryonaut, Noctua NT-H2) can reduce CPU temps by 5–8°C compared to factory pre-applied paste on many coolers.
GPU Cooling: When to Worry
- Under 80°C junction temperature: Normal operation. GPU is boosting at rated clocks.
- 80–88°C: Elevated but acceptable for most air-cooled reference designs. Monitor for sustained throttling.
- Above 90°C (junction) or 83°C (GPU core): Thermal throttling active. Frame rates are being suppressed.
If your GPU is throttling, options include: improving case airflow (see below), reapplying GPU thermal paste (advanced), adding aftermarket cooler pads on VRAM, or undervolting the GPU (covered in the driver section).
Case Airflow Configuration
Proper airflow routing removes hot air from your case before it reaches components:
OPTIMAL CASE AIRFLOW PATTERN:

FRONT (Intake)     REAR (Exhaust)
[Fan] [Fan] [Fan]  [Fan]
        |                ^
        v                |
    ============ CPU ===
    |   GPU            |
    ====================
         |
    [Bottom: PSU draws from outside if shrouded]

TOP: Exhaust fans (hot air rises)
SIDE: Avoid intake directly into GPU for hot cases
Rules of thumb:
- Maintain slight positive pressure (more intake than exhaust) to reduce dust infiltration
- Front and bottom fans: intake
- Rear and top fans: exhaust
- Ensure cable management does not restrict airflow paths between GPU and front fans
- An AIO radiator on a front intake position can cool both the CPU and the air entering the case
RAM CONFIGURATION FOR MAXIMUM 120 FPS PERFORMANCE
16GB vs. 32GB: Does It Matter for Gaming?
For most gaming scenarios in 2026, 32GB is the minimum we recommend for a serious gaming build. Here's why:
- Modern AAA games (Cyberpunk 2077, GTA VI, Flight Simulator 2024) regularly use 12–16GB system RAM during gameplay.
- Windows itself, browser tabs, Discord, and background apps consume 4–8GB before your game launches.
- 16GB is becoming tight for simultaneous gaming and streaming. When RAM fills up and the OS starts using the pagefile (even on NVMe), frame times spike — producing the stutters that show up as terrible 1% lows even when average FPS is fine.
- 32GB ensures your game runs entirely in RAM with headroom for the OS and background apps.
DDR4 vs. DDR5: Which Is Better for 120 FPS?
| Factor | DDR4 (e.g., 3600 MHz) | DDR5 (e.g., 6000 MHz) |
|---|---|---|
| Raw bandwidth | Adequate for 1440p gaming | 30–50% more bandwidth |
| AMD Ryzen impact | Good with tight timings | Significant uplift at 6000 MHz (IF=3:1) |
| Intel impact | Good at DDR4-3600 | Moderate improvement |
| Latency (CAS) | Lower absolute CAS | Higher CAS but faster clock compensates |
| Value | Excellent (legacy platforms) | Better for new builds |
For new builds: DDR5-6000 with CL30 timings is the sweet spot for AMD Ryzen 9000/7000 series (it hits the ideal Infinity Fabric ratio). DDR5-6400 CL32 for Intel Core Ultra 200 series. For existing DDR4 builds: ensure XMP is enabled (see BIOS section) and target DDR4-3600 or DDR4-3733 with tight timings (CL16 or better).
Dual-Channel Is Non-Negotiable
Running RAM in dual-channel mode (two sticks in the correct slots as indicated by your motherboard manual — usually slots A2 and B2 for most boards) roughly doubles your effective memory bandwidth. Going from single-channel to dual-channel can improve gaming FPS by 15–25% on CPU-intensive titles. Never run a single stick of RAM in a gaming system if you have the option to run two.
WINDOWS AND SYSTEM SOFTWARE OPTIMIZATION
Power Plan: The Easiest Windows Setting
Windows defaults to "Balanced" power plan, which allows the CPU to throttle clock speeds during idle periods to save power. During gaming, this can cause brief stutters as the CPU ramps up from idle to boost. Set it to "High Performance" or, better yet, "Ultimate Performance" (available on Windows 11 Pro and some Home editions via PowerShell).
Enable Ultimate Performance Power Plan
- Open PowerShell as Administrator.
- Run this command:
powercfg -duplicatescheme e9a42b02-d5df-448d-aa00-03f14749eb61Then open Power Options in Control Panel and select the newly appeared "Ultimate Performance" plan.
Xbox Game Bar and Background Processes
Xbox Game Bar (Win + G) has improved significantly but still consumes CPU resources. If you're not using its overlay or DVR features, disable it:
- Settings → Gaming → Xbox Game Bar → toggle off
- Settings → Gaming → Captures → disable background recording
Additionally, check Task Manager during gaming for background processes consuming CPU. Common culprits include Windows Update, antivirus scans, browser sync services, and cloud backup software. Configure these to run during non-gaming hours.
Hardware-Accelerated GPU Scheduling (HAGS)
Introduced in Windows 10 2004 and improved in Windows 11, HAGS allows the GPU to manage its own video memory rather than going through the CPU. On modern hardware (RTX 30/40/50 series, RX 6000/7000/9000 series) paired with a fast NVMe drive, this can reduce frame time variance and smooth out stutters.
Enable HAGS: Settings → System → Display → Graphics → Default graphics settings → Hardware-accelerated GPU scheduling → On. Requires restart.
HAGS Compatibility Note
On some older GPU/driver combinations, HAGS can cause instability or micro-stutters. If you enable it and experience new frame time issues, disable it and test again. It's system-dependent.
Disable High Precision Event Timer (HPET)
HPET is a legacy timer that can introduce overhead on modern systems. Many competitive gamers and overclockers disable it for slightly better timer precision via the Windows timer interrupt mechanism.
bcdedit /deletevalue useplatformclockRun as Administrator. Restart required. Results are subtle but measurable in timer-sensitive applications. Note: on some AMD systems, the opposite is true — test with and without.
Process Priority for Games
You can set your game process to "High" priority in Task Manager → Details tab → right-click the game EXE → Set Priority → High. This tells Windows to prioritize CPU time for your game over background tasks. Do not set it to "Real-time" — this can cause system instability by starving critical OS processes.
GPU DRIVER CONFIGURATION
NVIDIA Control Panel Optimization
The NVIDIA Control Panel contains settings that override in-game defaults and can meaningfully affect performance and image quality. Access it by right-clicking your desktop → NVIDIA Control Panel.
| Setting | Recommended Value | Why |
|---|---|---|
| Image Scaling | Off (use DLSS in-game instead) | DLSS is superior quality |
| Anisotropic Filtering | 16x (Application Controlled or forced) | Minimal perf cost, significant quality gain |
| Antialiasing - FXAA | Off | Use in-game TAA or DLSS |
| Low Latency Mode | Ultra | Reduces render queue depth, lowers input lag |
| Max Frame Rate | Your monitor's refresh rate | Prevents GPU overheating above display rate |
| Power Management Mode | Prefer Maximum Performance | Prevents GPU underclock at game start |
| Shader Cache Size | Unlimited (or 10GB+) | Reduces shader compilation stutters |
| Texture Filtering - Quality | High Performance | Slight FPS gain, minimal visual difference |
| Threaded Optimization | On | Uses multiple CPU threads for draw calls |
| Triple Buffering | Off (unless using VSync) | Reduces latency when not using VSync |
| Vertical Sync | Off (use G-SYNC instead) | G-SYNC handles synchronization without VSync latency |
| Virtual Reality Pre-Rendered Frames | 1 | Applies also to standard gaming; reduces latency |
AMD Adrenalin Optimization
| Setting | Recommended Value | Why |
|---|---|---|
| Radeon Super Resolution | Off (use FSR in-game) | In-game FSR is higher quality |
| Anti-Lag+ | On (per-game toggle) | Reduces system latency significantly |
| Radeon Boost | Optional | Dynamic resolution; effective for fast-paced games |
| Image Sharpening | 50–70% | Compensates for FSR softness at Quality mode |
| Enhanced Sync | Disable with FreeSync active | FreeSync handles sync; Enhanced Sync can conflict |
| FreeSync Premium | On | Primary adaptive sync solution for AMD |
| FRTC (Frame Rate Target Control) | Monitor refresh rate | Caps GPU, reduces heat, pairs with FreeSync |
| Shader Cache | Enabled (large) | Reduces stutters on first load |
| Texture Filtering | Performance | Marginal FPS gain |
G-SYNC / FreeSync Configuration
Adaptive sync is the technology that keeps your monitor refresh rate synchronized with your GPU frame rate, eliminating tearing and reducing stutter. Configuring it correctly matters:
- G-SYNC: Enable in NVIDIA Control Panel → Display → Set up G-SYNC. Select your monitor. Enable for windowed and full-screen. Turn V-Sync OFF in-game and in NVIDIA Control Panel. Set a frame rate cap 3 FPS below your monitor's max refresh rate (e.g., 117 FPS cap for 120Hz) using RTSS or NVIDIA's built-in limiter — this keeps frame rates in the G-SYNC range without exceeding it.
- FreeSync: Enable in AMD Adrenalin → Display. Ensure your monitor's FreeSync is also enabled in its OSD menu. Set FRTC to 3 FPS below max refresh.
- G-SYNC Compatible monitors with AMD cards: FreeSync and G-SYNC Compatible certification means NVIDIA GPUs can use these monitors' adaptive sync. Enable in NVIDIA Control Panel as above.
Clean Driver Install with DDU
Old driver remnants can cause instability, stutters, and unexpected behavior. Perform a clean install using Display Driver Uninstaller (DDU) when upgrading to a new GPU or when troubleshooting driver issues:
- Download DDU from Wagnardsoft.com
- Download your new driver from NVIDIA or AMD (don't install yet)
- Boot into Safe Mode (Settings → System → Recovery → Advanced startup)
- Run DDU, select "Clean and restart"
- After reboot, install the fresh driver package
- Configure NVIDIA Control Panel / Adrenalin settings as above

IN-GAME GRAPHICS SETTINGS OPTIMIZATION
Understanding which settings cost the most GPU performance versus which ones provide the most visual benefit lets you make intelligent trade-offs. This is where you recover the most frames without touching hardware.
High-Cost Settings to Reduce First
| Setting | Performance Cost | Visual Impact | Recommendation |
|---|---|---|---|
| Ray Tracing (Global Illumination) | Very High (40–60% FPS) | High | Disable unless GPU is powerful; use DLSS/FSR to compensate |
| Shadow Quality (Ultra/Extreme) | High (10–20%) | Medium | Set to High, not Ultra |
| Volumetric Fog/Clouds | High (10–15%) | Medium-Low in gameplay | Medium setting |
| Screen Space Reflections | Medium-High (8–15%) | Medium | Medium or off |
| Ambient Occlusion (HBAO+) | Medium (5–10%) | Medium | SSAO instead of HBAO+ |
| Anti-Aliasing (MSAA 8x) | Very High | High | Use TAA or DLSS instead; MSAA is legacy |
| Foliage/Vegetation Density | Medium (5–12%) | Low in non-nature games | Medium |
| Render Distance (Max) | Medium-High | High in open-world | High, not Maximum |
Low-Cost Settings to Keep High
| Setting | Performance Cost | Visual Impact | Recommendation |
|---|---|---|---|
| Texture Quality | Low (VRAM-limited) | Very High | Maximum (if VRAM allows) |
| Anisotropic Filtering | Near Zero | High (texture sharpness) | 16x always |
| Motion Blur | Low | Negative for competitive play | Disable entirely |
| Depth of Field | Low | Subjective | Disable (reduces visual clarity) |
| Chromatic Aberration | Near Zero | Negative | Disable |
| Film Grain | Near Zero | Negative for clarity | Disable |
| Lens Flare | Near Zero | Negative for gameplay | Disable |
Resolution Scaling: DLSS, FSR, and XeSS
These technologies render at a lower internal resolution and upscale to your display resolution using AI or algorithmic methods. They are not compromises — at Quality mode, most users cannot distinguish them from native rendering.
- DLSS 4 (NVIDIA RTX): Use Quality mode for the best visual result with significant FPS gains. Use Balanced mode if you need more frames. Multi Frame Generation (RTX 40/50 series) can double or quadruple effective frame output — enable it when available.
- FSR 4 (AMD RX 9000 series) / FSR 3 (older AMD): Quality mode provides very good results. Pair with Frame Generation where available.
- XeSS (Intel): Works on all GPUs; quality is best on Intel Arc but acceptable on NVIDIA and AMD.
Rule of thumb: If a game supports DLSS, enable it at Quality mode before reducing any other setting. The frame gain is almost always larger than reducing a single setting, with minimal visual trade-off.
MONITOR CONFIGURATION AND CALIBRATION
Verifying 120Hz Is Actually Active
Many monitors ship defaulting to 60Hz regardless of their maximum spec. Verify and set the correct refresh rate:
- Right-click Desktop → Display Settings → Advanced Display
- Select your monitor and set Refresh Rate to 120Hz (or the highest available)
- Click "Keep Changes"
Also check the monitor's OSD (on-screen display) for any internal refresh rate lock — some monitors have this setting independent of the Windows value.
G-SYNC Verification
To confirm G-SYNC is active and working, go to NVIDIA Control Panel → Display → Set up G-SYNC → you should see your monitor listed with a checkmark. You can also enable the G-SYNC indicator in the NVIDIA Control Panel which displays a "G-SYNC" text overlay during gaming when the technology is actively synchronizing frames.
Response Time and Overdrive
Gaming monitors offer multiple response time overdrive settings (Normal, Fast, Fastest, Extreme). Higher overdrive modes reduce the pixel transition time, which reduces ghosting — but too much overdrive causes "overshoot" or "inverse ghosting" where pixels briefly flicker the wrong color before settling. Test your monitor's overdrive at your target refresh rate: start at the second-highest setting and lower if you see bright halos trailing moving objects.
Monitor OSD Settings for 120Hz Gaming
- Set refresh rate to 120Hz (or maximum)
- Enable FreeSync (AMD) / G-SYNC Compatible mode
- Set overdrive to "Fast" or equivalent (avoid "Fastest" or "Extreme" on most panels)
- Disable any frame interpolation or "motion enhancement" features
- Reduce input lag mode if available (usually labeled "Game Mode" or "Low Input Lag")
- Calibrate brightness to your room lighting (80–120 nits for most indoor gaming environments)
STORAGE OPTIMIZATION
Why NVMe Matters for Frame Times (Not Just Load Times)
SSD speed is not just about how fast your game loads — it directly affects frame time consistency during gameplay. Games with large open worlds continuously stream assets from storage as you move through the environment. When storage can't keep up with the game's demand, you get traversal stutters — brief but jarring frame time spikes that don't show up in average FPS but are immediately noticeable during play.
High-speed NVMe SSDs paired with DirectStorage (supported in Windows 11 and DX12 games) allow the GPU to decompress assets directly from NVMe without passing through the CPU, eliminating a bottleneck that plagued large open-world games on traditional storage setups.
Storage Tier Recommendations
| Storage Type | Sequential Read | Gaming Impact | Recommendation |
|---|---|---|---|
| PCIe 5.0 NVMe (Samsung 990 Pro, WD Black SN850X) | 12,000–14,000 MB/s | Best frame time consistency, fastest load | Ideal for primary game drive |
| PCIe 4.0 NVMe (Samsung 980 Pro, WD Black SN850) | 7,000 MB/s | Excellent — negligible difference from Gen 5 in practice | Excellent value choice |
| PCIe 3.0 NVMe | 3,500 MB/s | Good for most games; may stutter in massive open worlds | Acceptable; upgrade when possible |
| SATA SSD | 550 MB/s | Acceptable load times; traversal stutters in large games | Acceptable for older game libraries only |
| HDD | 100–180 MB/s | Significant traversal stutters; not recommended for gaming | Avoid for game installs in 2026 |
Action item: Install your most-played games on your fastest NVMe drive. Use secondary storage for games you play less frequently. Ensure your NVMe drive is not fragmented (Windows should auto-optimize) and has at least 15–20% free space to maintain write performance.
COMPLETE 120 HZ GAMING OPTIMIZATION CHECKLIST
Use this comprehensive checklist to verify every optimization has been applied to your system. Work through it top to bottom — check hardware fundamentals first before moving to software.
Hardware Checklist
- GPU is appropriate for target resolution and frame rate (see GPU selection tables above)
- CPU is not bottlenecking GPU — verified with utilization monitoring
- RAM is installed in dual-channel configuration (two sticks in correct slots per motherboard manual)
- RAM capacity is 32GB or higher for modern gaming
- Primary game drive is PCIe 4.0 or 5.0 NVMe SSD
- CPU cooling is adequate for CPU TDP class (see thermal table above)
- GPU temperatures stay below 83°C core / 90°C junction under load
- Case airflow is correctly configured (front intake, rear/top exhaust)
- All power connectors are fully seated (GPU 8-pin / 16-pin PCIe)
- Monitor is capable of 120Hz and connected via DisplayPort (not HDMI 1.4 or older)
BIOS Checklist
- XMP (Intel) or EXPO (AMD) enabled — RAM running at rated speed
- Above 4G Decoding enabled
- Resizable BAR (ReBAR / Smart Access Memory) enabled
- CPU power limits set appropriately (not artificially restricted)
- BIOS firmware updated to latest stable version
- Secure Boot enabled (required for some DX12 / DirectStorage games)
Windows Checklist
- Power plan set to "High Performance" or "Ultimate Performance"
- Hardware-Accelerated GPU Scheduling (HAGS) enabled
- Xbox Game Bar background recording disabled
- Monitor refresh rate set to 120Hz in Display Settings
- G-SYNC or FreeSync enabled and verified active
- Windows updated to latest version (DirectStorage improvements ship via Windows Update)
- GPU drivers current — installed clean via DDU if recently changed GPU
- No background processes consuming significant CPU during gaming
- Game installed on NVMe SSD with 20%+ free space
- HPET disabled via bcdedit (test both states; benefit is system-dependent)
GPU Driver Checklist
- Low Latency Mode set to Ultra (NVIDIA) or Anti-Lag+ enabled (AMD)
- Power Management Mode set to Prefer Maximum Performance (NVIDIA)
- Max Frame Rate cap set to monitor refresh rate (NVIDIA) or FRTC set (AMD)
- Shader Cache set to Unlimited or maximum allowed
- VSync disabled in Control Panel / Adrenalin (use G-SYNC/FreeSync instead)
- Threaded Optimization enabled (NVIDIA)
- G-SYNC or FreeSync configured and verified
In-Game Settings Checklist
- DLSS (NVIDIA) or FSR (AMD) enabled at Quality mode where available
- Motion Blur disabled
- Depth of Field disabled
- Chromatic Aberration disabled
- Film Grain disabled
- Ray Tracing evaluated: only enable if GPU can maintain 120 FPS with it
- Shadow quality reduced from Ultra to High
- Volumetric effects at Medium
- Texture quality at maximum (VRAM permitting)
- Anisotropic filtering at 16x
- VSync disabled in-game (use adaptive sync instead)
- Frame rate cap set or confirmed uncapped (for G-SYNC/FreeSync use case)
- NVIDIA Reflex or AMD Anti-Lag enabled where available
WHEN OPTIMIZATION REACHES ITS LIMITS: UPGRADE DECISION FRAMEWORK
Software optimization can take you a long way, but there's a ceiling determined by your hardware. Here's how to recognize when it's time to upgrade a component rather than tweak a setting.
Signs You Need a GPU Upgrade
Upgrade Your GPU When:
- GPU utilization is consistently at 99–100% and you're not hitting 120 FPS
- You've reduced settings to Medium or Low and still can't hit 120 FPS in your target games
- DLSS/FSR is enabled at Performance mode and you're still below 100 FPS
- Your GPU is more than two generations old and you're targeting 1440p or 4K
- VRAM is consistently maxed out (check MSI Afterburner VRAM usage graph)
Signs You Need a CPU Upgrade
Upgrade Your CPU When:
- GPU utilization is below 80% while frame rates are below 120 FPS
- CPU utilization shows one or two cores pegged at 100% during gaming
- Lowering resolution from 1440p to 1080p does not significantly increase FPS (indicates CPU is the ceiling)
- You're on a CPU older than 4 generations (e.g., still on 10th or 11th gen Intel, or Ryzen 3000 series)
- You're gaming in CPU-heavy titles (RTS, open-world sims, city builders) and cannot hit 120 FPS even at reduced settings
Signs You Need a RAM Upgrade
Upgrade Your RAM When:
- Task Manager shows RAM usage above 85% during gaming
- You're running 16GB and experiencing stutters in modern AAA games
- You're still on single-channel configuration (one stick)
- Your RAM speed is below DDR4-3200 or DDR5-4800 after enabling XMP/EXPO
- Moving games to faster storage (NVMe) did not eliminate traversal stutters
Signs You Need a Storage Upgrade
Upgrade Your Storage When:
- You experience consistent stuttering in open-world games that goes away when you stand still
- Primary game drive is a SATA SSD or HDD
- DirectStorage is enabled in Windows but your drive is PCIe 3.0 or older
- Drive health tool (CrystalDiskInfo) shows drive health warnings
- Your NVMe is more than 80% full and you notice degraded write performance
CONCLUSION
Achieving and sustaining 120 FPS is a system-wide commitment. No single setting or upgrade delivers the result in isolation — it's the sum of correctly configured hardware, optimized BIOS settings, a tuned Windows environment, proper driver configuration, intelligent in-game trade-offs, and a monitor that can actually display what your GPU is rendering.
The good news: most of the optimizations in this guide are free. Enabling XMP, configuring G-SYNC, disabling motion blur, setting your power plan, and eliminating unnecessary background processes costs nothing and can collectively add 10–25% to your effective gaming performance. Do the free things first, measure your results, and then make informed hardware decisions.
When you do need new hardware, buy to the performance tier your resolution and target games demand — not to the limit of your budget. A well-configured mid-range system consistently outperforms a high-end system that's been left on default settings.
At Lone Star True Custom Rigs, every build we ship is configured with XMP enabled, Resizable BAR active, optimized power settings, and properly installed drivers. We do the groundwork before it ships so you can game at full performance out of the box. If you're ready to build your 120 FPS machine, our configurator and pre-built lineup are the place to start.
BUILD YOUR 120 FPS MACHINE
Ready to build a PC that hits 120 FPS out of the box? Configure yours in minutes with our custom builder — every component hand-picked for maximum performance.
BUILD YOUR OWN VIEW PRE-BUILTS